
What if the difference between a standard DIY project and a bespoke masterpiece lies entirely in a single turn of a screwdriver? Even the most expensive hand-sprayed finishes or elegant mirror fretwork doors lose their charm if they hang at a slight angle or scrape against an uneven floor. You likely recognise that achieving a seamless, high-end look is a meticulous task; it is particularly challenging when you’re contending with the architectural quirks of traditional British homes and wonky floorboards.
We’ve designed this professional guide on how to fit wardrobe doors to ensure your final installation reflects the true quality of your chosen materials. You’ll gain the confidence to handle premium components while learning the technical secrets of precision alignment and soft-close functionality. We will walk you through the essential tools, frame preparation, and the sophisticated hinge adjustments required to transform individual panels into a cohesive, luxury wardrobe that feels as expensive as it looks.
Key Takeaways
- Learn how to organise a professional-grade workspace that protects hand-sprayed finishes whilst ensuring every tool is within reach for precision.
- Discover the technical nuances of how to fit wardrobe doors using high-specification soft-close concealed hinges for a truly bespoke feel.
- Master the sequence of hanging doors by prioritising top-hinge attachment and utilising support tools for a flawless solo installation.
- Gain the expertise to correct misalignments through three-dimensional hinge adjustments, ensuring perfectly uniform gaps and level doors.
- Elevate your cabinetry with professional hardware placement techniques, using drilling templates to achieve mathematical precision for handles and knobs.
Preparing for Precision: Essential Tools and Workspace Set-up
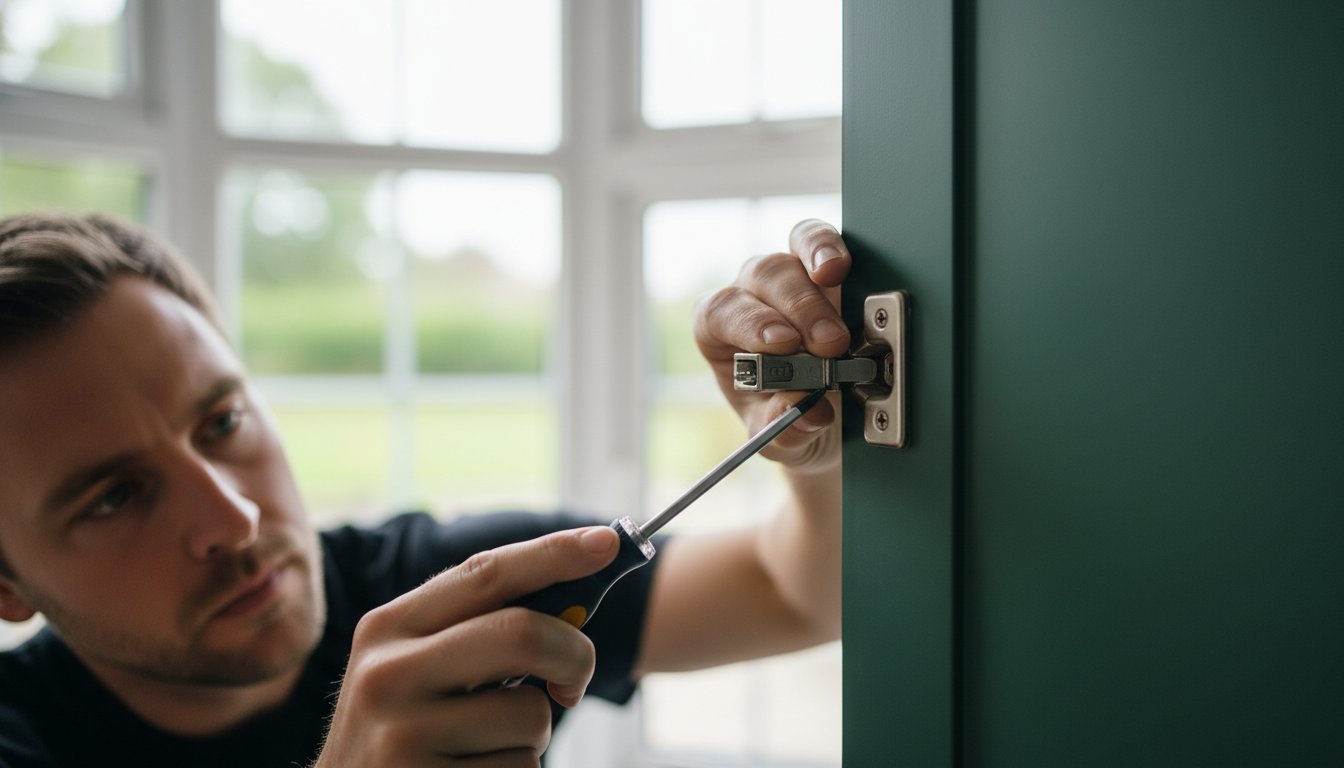
The foundation of a luxury installation begins long before a single screw is driven into the timber. When you are learning how to fit wardrobe doors to a professional standard, your preparation dictates the final aesthetic. A cluttered or abrasive environment is the enemy of a bespoke finish. You should begin by organising a clean, flat workspace, ideally using soft trestles or protective blankets. This prevents any micro-scratches on the delicate hand-sprayed finish that defines premium cabinetry. Unlike standard factory finishes, hand-sprayed surfaces require extra care to maintain their deep, uniform lustre during the assembly process.
Before unpacking your components, verify the vertical and horizontal levels of your wardrobe carcasses. Modern Cabinetry construction relies on perfectly square foundations, yet British properties often present uneven floors and non-plumb walls. If the carcass is twisted, the doors will never align correctly, regardless of your hinge adjustments. It’s essential to cross-reference your physical door dimensions against your replacement wardrobe doors made to measure order. This ensures every millimetre matches your design specifications before you proceed to the technical stages of fitting.
The Professional Toolkit for a Luxury Result
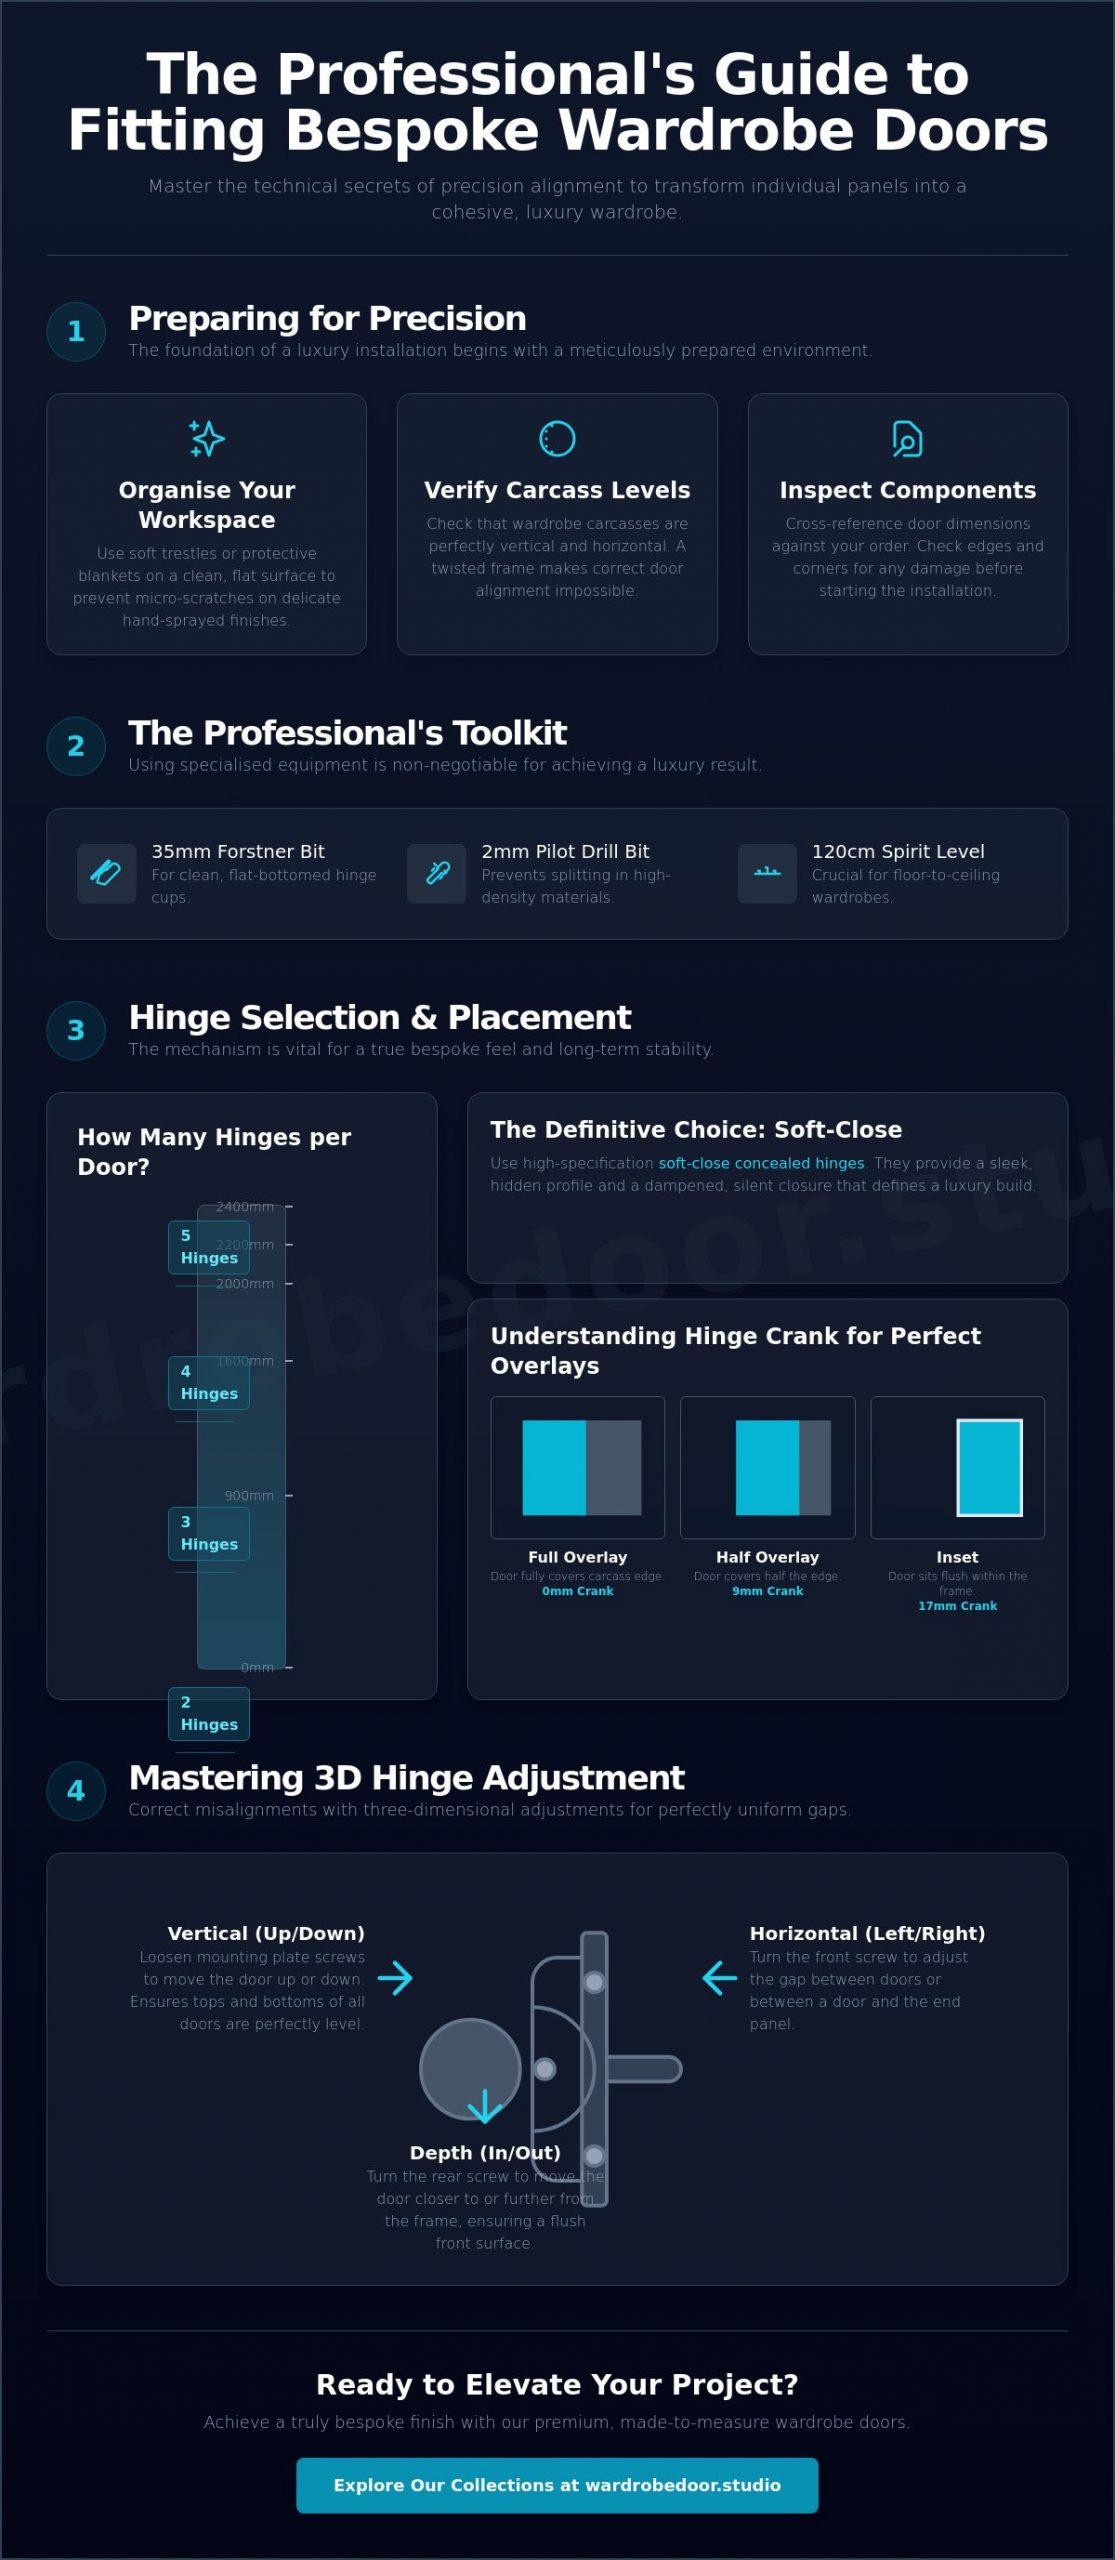
Precision requires specialised equipment. A high-quality 35mm Forstner bit is non-negotiable; it creates the clean, flat-bottomed hinge cups necessary for a flush fit. Unlike standard drill bits, a Forstner bit minimises tear-out on the face of the door. Complement this with a 2mm pilot drill bit. High-density materials used in luxury doors are prone to splitting if you drive screws directly into the surface. Using a pilot hole ensures the pozipan screws seat securely without compromising the material’s integrity. Finally, invest in a 120cm spirit level. Shorter levels often fail to capture the subtle leans in floor-to-ceiling wardrobes, which can lead to unsightly gaps at the top of the run.
Inspecting Your Bespoke Doors and Frames
Once your tools are ready, conduct a thorough inspection of the installation site. In many older UK homes, walls often bow or taper. Identifying these issues early allows you to plan for liners or scribing pieces. Check that the hinge hole centres on your new doors align precisely with the mounting plates on your frame. Before you reach this stage, it is worth consulting a dedicated resource on how to measure for new wardrobe doors to ensure your aperture dimensions and reveal allowances are calculated with absolute certainty. Whilst moving your doors into position, pay particular attention to the edges. Hand-sprayed finishes are most vulnerable at the corners. Use corner protectors or keep the doors in their protective wrapping until the moment of hanging. This meticulous approach is the first step in mastering how to fit wardrobe doors with the signature of a master craftsman.
Selecting and Installing the Right Hinges for Bespoke Doors
Luxury cabinetry demands more than a standard butt hinge. Concealed hinges, often referred to as “cup hinges,” are the definitive choice for high-end installations. They provide a sleek, hidden profile that allows your door design to take centre stage without visible hardware interrupting the aesthetic. When considering how to fit wardrobe doors, the choice of mechanism is vital. Soft-close functionality is a non-negotiable feature for bespoke projects; it provides that dampened, silent closure that feels inherently expensive and protects the hand-sprayed finish from the impact of slamming.
Before installation, you must calculate the number of hinges required based on the door’s physical properties. Whilst standard doors might only require two, full-height bespoke doors often demand more to ensure long-term stability and prevent the material from bowing. Use the following guidelines for professional results:
- Doors up to 900mm: 2 hinges
- Doors 900mm to 1600mm: 3 hinges
- Doors 1600mm to 2000mm: 4 hinges
- Doors over 2000mm: 5 hinges
You should also verify the hinge “crank” required for your specific carcass design. A 0mm crank is standard for full overlay doors, where the door hides the entire carcass edge. If your design features a half-overlay or an inset finish, you’ll need a 9mm or 17mm crank respectively. Whilst this article focuses on high-end specifications, you can find a basic step-by-step guide to hanging doors to familiarise yourself with the fundamental mechanics of hinge attachment.
Drilling Hinge Holes with Surgical Accuracy
Precision is paramount when boring the 35mm cup holes. Mark your centre point exactly 22.5mm from the edge of the door to ensure the hinge sits perfectly flush. It’s critical to set the depth stop on your drill; if you’re too aggressive, you risk piercing through the face of your hand-sprayed door. The optimal distance for hinge placement is typically 100mm from the top and bottom edges of the door.
Mounting the Hinge Plates to the Carcass
The mounting plate is what actually bears the weight of the door. For standard chipboard carcasses, Euro-screws provide superior grip in pre-drilled 5mm holes, whilst solid timber frames may require high-quality wood screws. Ensure a consistent 37mm setback from the front edge of the carcass to the centre of the screw holes. If your plates aren’t perfectly vertical, the hinge will bind, leading to premature wear. If the technical complexity of hardware selection feels daunting, our Professional Installation service ensures every component is perfectly specified for your project. Mastering how to fit wardrobe doors starts with this meticulous attention to hardware alignment.
A Step-by-Step Guide to Hanging Your Wardrobe Doors
The physical act of hanging is the moment of truth in any bespoke installation. Once your hinges and plates are secured, you must approach the mounting process with methodical care to protect the door’s structural integrity. You should always begin by attaching the top hinge to its corresponding mounting plate. This allows the uppermost hardware to support the majority of the door’s weight whilst you align the remaining hinges. Attempting to start from the bottom often leads to unnecessary strain on the frame and can cause the door to drop, potentially marking your flooring.
If you’re working alone, support the base of the door using a foot-operated lifter or plastic packers. This keeps the door at the precise height required to line up the hinge arms with the plates. Once aligned, press the hinge arm onto the plate until you hear an audible “snap” or click. This sound confirms the mechanism is securely locked. After all hinges are clipped in, perform an initial swing test. You are looking for any immediate resistance or rubbing against the carcass or adjacent doors. Early detection of these issues prevents damage to the hand-sprayed finish before you move into the final adjustment phase.
Handling Specialised Designs: Mirror Fret and Skinny Shaker
Bespoke designs require a heightened level of sensitivity during installation. When you are learning how to fit wardrobe doors of the skinny shaker wardrobe doors variety, you must be mindful of frame flex. The narrow stiles are elegant but offer less lateral rigidity than traditional designs; always support the centre of the door whilst clipping hinges to prevent any bowing. Similarly, mirror fretwork doors demand a delicate touch. Avoid placing direct pressure on the glass or the intricate fretwork overlays. Instead, apply pressure only to the solid timber stiles to ensure the “clipping on” phase doesn’t compromise the decorative elements.
Fitting Doors to IKEA PAX and Other Existing Frames
Upgrading existing frames, such as the IKEA PAX system, is a common route to achieving a high-end look without a full renovation. The challenge lies in aligning bespoke hinge centres with pre-drilled carcass holes that may follow a different grid. We ensure our bespoke doors are bored to match these specific specifications, but you must still verify the door reveal. Because bespoke doors are often thicker than standard off-the-shelf options, you may need to adjust the mounting plate depth to ensure the door doesn’t bind against the frame edge. Maintaining a consistent 2mm to 3mm gap across the entire run is the hallmark of a professional who truly understands how to fit wardrobe doors with a seamless, integrated finish.
Troubleshooting and Perfecting the Alignment
Alignment is the final, most critical stage of the installation process. Even if you have followed every instruction on how to fit wardrobe doors, the natural weight of the panels and the settling of the carcass often necessitate fine-tuning. Professional hinges feature a “Three Dimensions of Adjustment” system, allowing you to manipulate the door’s position without removing it from the frame. Mastering these three screws is the secret to achieving that uniform, high-end look where every line is perfectly parallel.
- Side-to-Side Adjustment: The front screw on the hinge arm controls the lateral movement. This is utilised to perfect the “reveal,” the vertical gap between a pair of doors or between the door and the frame.
- Depth Adjustment: The rear screw moves the door closer to or further from the carcass. This ensures the door sits perfectly flush with the frame, preventing it from protruding or binding.
- Height Adjustment: Screws on the mounting plate itself allow you to shift the entire door up or down, which is vital for levelling the top edges across a long run of wardrobes.
If you encounter a door that looks crooked or has uneven gaps, don’t panic. This is often caused by the carcass “racking,” where the cabinet has shifted slightly out of square. By meticulously balancing the side-adjustment screws on the top and bottom hinges, you can compensate for these structural imperfections. If the technical alignment proves too demanding, our Professional Installation team can ensure a flawless finish.
Achieving the Perfect 2mm Reveal
The hallmark of luxury cabinetry is a consistent 2mm gap, or reveal, around every door. We recommend using 2mm spacers or packers during the adjustment phase to maintain this uniformity. A common professional secret involves adjusting the bottom hinge slightly further than the top one; this technique effectively corrects a “leaning” door caused by a carcass that isn’t perfectly plumb. This level of detail separates a standard fit from a bespoke finish.
Managing Uneven Floors and Sloping Ceilings
British properties are rarely square, and uneven flooring is a frequent challenge. Use the height adjustment screws to ensure the bottom of the doors clear the carpet or hard flooring whilst keeping the top edges level. When a wardrobe meets a wall that isn’t straight, you may need to use “filler pieces” or “scribes” to mask the gap. Finally, always verify that your handle holes are level across the entire run. Even perfectly aligned doors can look “off” if the hardware is out of alignment by even a single millimetre. This meticulous approach is essential when learning how to fit wardrobe doors in older, characterful homes.
Elevating the Result: Finishing Touches and Hardware
The hardware you select acts as the jewellery of your cabinetry, providing the final tactile experience of a bespoke installation. To maintain the aesthetic integrity of your project, you must choose handles or knobs that complement the depth and texture of our hand-sprayed finishing. A common error in standard installations is the haphazard placement of hardware. Professional fitters utilise a dedicated drilling template to ensure every handle is positioned with mathematical precision. This level of accuracy is what distinguishes a custom-built wardrobe from a generic flat-pack alternative.
Once your hardware is secured, perform a final audit of the soft-close functionality. Many high-specification hinges feature individual tension adjustment screws. If a door is closing too slowly or rebounding slightly, you can fine-tune the dampening effect to match the specific weight of the panel. After all mechanical adjustments are complete, clean the doors with a soft, dry microfibre cloth. This removes any fingerprints or dust accumulated during the fitting process without compromising the delicate surface of the paintwork. Understanding how to fit wardrobe doors to a professional standard concludes with these meticulous final steps.
Installing Premium Handles and Knobs
Precision drilling is the most nerve-wracking part of the process. To prevent “blow-out,” where the drill bit exits the back of the door and splinters the material, you should always clamp a sacrificial block of scrap wood to the rear of the panel. Drill from the front to the back at a steady speed. For optimal ergonomics, handles are typically positioned between 1000mm and 1100mm from the floor. If you’ve chosen T-bar handles, double-check your vertical versus horizontal orientation across the entire run; a single misaligned bar will immediately disrupt the visual flow of the room.
Long-term Maintenance for Bespoke Wardrobes
Bespoke furniture is an investment in enduring quality. Whilst our British-made doors are designed for durability, the natural settling of a building or the heavy use of a wardrobe may cause hinges to require minor attention over time. If a door begins to drop under its own weight, simply revisit the height adjustment screws covered in the previous section. When cleaning intricate mirror fretwork, apply glass cleaner to your cloth rather than the door itself. This prevents liquid from seeping behind the fretwork overlays and damaging the surrounding finish. This commitment to maintenance ensures your mastery of how to fit wardrobe doors results in a finish that remains flawless for decades.
Transforming Your Space with Professional Precision
Achieving a bespoke finish is a journey of meticulous details, from the initial workspace set-up to the final turn of a hinge adjustment screw. You now possess the technical knowledge to navigate the complexities of uneven floors and delicate mirror fretwork with absolute confidence. Mastering how to fit wardrobe doors ensures that your investment in high-quality materials is reflected in the flawless operation and perfect alignment of the final installation. By prioritising precise hinge boring and utilising three-dimensional adjustments, you can easily overcome the common architectural quirks found in traditional British homes.
If you’re ready to begin your next interior transformation, explore our range of bespoke British-made wardrobe doors. Our collection encompasses wardrobe door styles UK designers recommend for 2026, with every piece hand-sprayed in England and available with nationwide UK delivery for your convenience. Whether you’re a seasoned trade professional or a dedicated homeowner, the right approach transforms a simple storage solution into a masterpiece of craftsmanship. With these professional techniques at your disposal, your vision for a perfectly tailored and elegant interior is well within reach.
Frequently Asked Questions
Can I fit new wardrobe doors to my existing frames?
Yes, you can certainly fit bespoke doors to existing carcasses, such as IKEA PAX or custom timber frames, provided the structure is stable and level. This approach allows for a significant aesthetic upgrade without the disruption of a full room renovation. You must ensure your measurements account for any carcass racking to maintain a uniform reveal across the new installation.
How many hinges do I need for a full-height wardrobe door?
A full-height door exceeding 2000mm typically requires five hinges to ensure long-term stability and prevent the material from bowing. For doors between 1600mm and 2000mm, four hinges are usually sufficient to support the weight. This distribution is essential when learning how to fit wardrobe doors that feature heavier luxury materials or intricate mirror fretwork.
What is the standard gap (reveal) between wardrobe doors?
The professional standard for the reveal, or the gap between wardrobe doors, is 2mm to 3mm. This narrow margin provides a sophisticated, integrated appearance whilst allowing enough clearance for the doors to swing freely without binding. Consistency across the entire run of cabinetry is the hallmark of a meticulous, high-quality installation that feels truly bespoke.
How do I adjust a wardrobe door that is rubbing at the bottom?
You can rectify a door rubbing at the bottom by utilising the vertical adjustment screws located on the hinge mounting plates. Loosen the screws slightly, lift the door to the desired height, and then retighten them securely. If the flooring is significantly uneven, you may also need to adjust the side-to-side screws to tilt the door slightly for better clearance.
Do I need a professional to fit bespoke wardrobe doors?
While a competent individual can follow our guide on how to fit wardrobe doors, professional installation is recommended for complex bespoke projects. Expert fitters possess the specialised tools and experience to manage architectural irregularities and delicate hand-sprayed finishes. This ensures a flawless result that preserves the enduring value of your premium cabinetry.
How do I drill hinge holes without a drill press?
You can achieve precise hinge cups without a drill press by using a sharp 35mm Forstner bit and a handheld power drill. It is critical to use a drilling jig or a depth stop to prevent the bit from piercing the face of the door. Always perform a test bore on a scrap piece of similar material to verify the depth before proceeding with your bespoke doors.
What should I do if my walls are not straight when fitting wardrobes?
When walls are not plumb, the most effective solution is to use scribing pieces or matching filler panels. These components are cut to follow the exact contour of the wall, creating a seamless transition between the wardrobe and the room’s architecture. This technique hides unsightly gaps and ensures the cabinetry looks perfectly integrated into the space.
How do I protect the hand-sprayed finish whilst installing handles?
To protect a hand-sprayed finish, always clamp a sacrificial block of wood to the back of the door before drilling handle holes. This prevents the material from splintering as the bit exits the rear. Additionally, using a dedicated drilling template with a soft underside prevents the metal guide from scratching the delicate paintwork during the marking and drilling process. If you have not yet ordered your doors, reviewing a professional guide on how to measure for new wardrobe doors will ensure your handle hole positions and clearance requirements are specified correctly from the outset.


